
Page 50 - MSDN Magazine, September 2018
P. 50
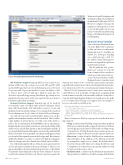
Figure 4 Enabling Automatic Provisioning
iOS Platform Support Xamarin.iOS has been refactored to include a fully static type system. As a result, iOS, macOS, tvOS and watchOS apps that you write with Xamarin are now between 30 percent and 50 percent smaller, because the linker is able to remove more code at build time. Memory usage has also decreased, especially at app startup. In addition, app startup is now much faster because most of the type registration is now done at build time rather than at runtime.
Android Platform Support Xamarin support for Android now includes a new tool called Android Device Manager, which ships with Visual Studio 2017 and makes it easier to create and maintain Android emulator images. You can launch the Android Device Manager via Tools | Android | Android Device Manager.
Not only can you create and edit emulator images, you can also quickly start an emulator instance via the Start button. This tool offers a large number of options that are out of the scope of this article, so refer to the documentation at bit.ly/2LhFUB1 for more information. Included in the recent update is the release of the Android Oreo SDK (API Level 27) and a feature known as Auto Install Android SDKs. If you open and build a project that requires a version of the Android SDK that you don’t have on your machine, a notification will appear to help you download the required version in the background. This feature is disabled by default, so you have to open Tools | Options | Xamarin | Android Settings and select Enable Auto Install Android SDKs.
It’s worth mentioning that Microsoft has also announced a preview ofaGoogleAndroidemulatorthatrunsonHyper-V.Thisisavery important addition, because many developers used to work with the Visual Studio Android Emulator, which is based on Hyper-V and was recently discontinued by Microsoft. The new preview requires the
Windows 10 April 2018 update with the Windows HyperVisor Platform installed and Visual Studio 2017 15.8 Preview 1 (or higher). Because the emulator is still in preview, I don’t cover it in this article, but you can read a very detailed and interesting blog post by Miguel de Icaza about it at bit.ly/2JsVrcq.
Xamarin.Forms Updates
Microsoft released Xamarin.Forms 3.0 at the Build 2018 conference in May, and more recently made Xamarin.Forms 3.1 available via NuGet. For developers building cross-platform apps with C#, the updates bring amazing new features and significant platform and UI improvements.
On the platform side, perfor- mance got a major boost in the form of improved fast renderers, which were introduced with ver- sion 2.5 last year. Renderers enable Xamarin.Forms to translate visual
elements into native views—work that can get pretty expensive, especially with complex views. Microsoft redesigned the way render- ers work in version 3.0 to boost rendering speed and performance.
On the UI side, Xamarin.Forms 3.0 introduces a new layout called FlexLayout. It works like a StackLayout, arranging child visual elements vertically or horizontally, while also being able to wrap the child visual elements if there’s not enough space in a single row or column. The following code snippet shows an example of how you can easily use a FlexLayout:
<FlexLayout Wrap="Wrap" JustifyContent="SpaceAround">
<!-- Place new controls here -->
<Label Text="A label" FlexLayout.AlignSelf="Center"/>
<Image Source="Image1.jpg" FlexLayout.AlignSelf="Center"/>
<Button x:Name="Button1" Text="Tap here" FlexLayout.AlignSelf="Center"/>
</FlexLayout>
There are numerous FlexLayout properties, but the three most important are:
• Wrap: A value from the FlexWrap enumeration that specifies if FlexLayout content should be wrapped to the next row if there’s not enough space in the first. Possible values are Wrap (wraps to the next row), NoWrap (keeps the view content on one row) and Reverse (wraps to the next row in the opposite direction).
• Direction: A value from the FlexDirection enumeration that determines if the children of the FlexLayout should be arranged in a single row or column. The default value is Row, but other possible values are Column, RowReverse and ColumnReverse (where Reverse means that child views will be laid out in the reverse order).
• JustifyContent: A value from the FlexJustify enumeration that specifies how child views should be arranged when there’s
42 msdn magazine
Xamarin.Forms
