
Page 48 - MSDN Magazine, September 2018
P. 48
As you know, building apps for iOS with Xamarin in Visual Studio 2017 requires that the same version of the Xamarin.iOS SDK be installed on both your Windows PC and Mac machine. If there was a version mismatch, Visual Studio reported a warning and you had to update your Mac manually. This is no longer neces- sary. Visual Studio 2017 now offers to install the latest version of the Xamarin.iOSSDKontheMaconyourbehalf.YousimplyclickInstall in the Pair to Mac dialog box and wait for the update to complete.
Beyond binding are improvements to popular existing features like Peek Definition and Go To Definition, which are now much more reliable in the Xamarin.Forms XAML editor.
Xamarin Tools for Automatic iOS Provisioning Creating apps for iOS requires some preliminary steps that can be really com- plicated. In addition to enrolling in Apple’s Developer Program, which is required to enable your Apple developer account to sign and publish apps to the App Store, you need to provision your iOS device. iOS provisioning will enable you to deploy and test your app on a device. iOS provisioning is usually done via Xcode on the Mac. Put succinctly, iOS provisioning requires you to:
• Create a development team: This includes specifying the list of Apple developer accounts in the development team, enabling them to sign and publish an app.
• Set up provisioning profiles: A provisioning profile is bundled into the compiled app package and contains three things: an app unique identifier (App ID), one or more development certificates required to test an app on physi- cal devices, and a Unique Device Identifiers (UDI) list that enumerates devices allowed to run an app.
• Create signing certificates: All apps must be signed before they can run on an iOS device, even for development, so a signing certificate is required. Different kinds of certificates are available to each developer account (such as development and publishing) depending on the level of subscription.
The Xamarin Team at Microsoft has created a useful document that explains how to get started with iOS provisioning (bit.ly/ 2NhzO0O), but the reality is that complexity is the biggest barrier for developers wanting to build apps for iOS. Fortunately, the latest releases of Visual Studio 2017 include support for automatic iOS provisioning. You simply provide your Apple developer account and Visual Studio 2017 will set up all the necessary artifacts on your behalf, through a connection to a Mac machine. To accom- plish this, you must first associate your Apple ID to Visual Studio via Tools | Options | Xamarin | Apple Accounts. In the Options dialog, you’ll be able to associate one or more Apple IDs by clicking the Add button, after which Visual Studio 2017 shows the list of associated teams and the user role for each team.
Once you click OK, you can go to the iOS Bundle Signing tab of the Xamarin.iOS project properties and select the Automatic Provisioning option (see Figure 4).
You’ll simply need to select the Team you wish to use for develop- ment from the Team dropdown and Visual Studio will generate the necessary provisioning profiles and signing certificates required to test
apps on a physical device (which must be connected to the Mac machine).
Platform Support
Improvements
The latest Xamarin releases include improvements that target several platforms, including Android, iOS, Tizen and macOS. In this article, I’ll explore platform improvements for iOS and Android, both of which share an updated project template wizard. When you create a new iOS or Android project, you’re prompted with a list of common templates (sin- gle view, master-detail, tabbed app and blank app). The project template wiz- ard will also allow you to specify what kind of devices you want to support in your apps. Additionally, support for both platforms has been enhanced with specific improvements.
Xamarin.Forms
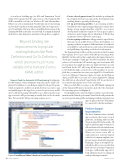
Figure 3 IntelliSense Makes It Easier to Create Binding Expressions 40 msdn magazine
