
Page 24 - MSDN Magazine, March 2019
P. 24
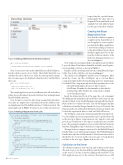
Figure 5 Adding a Reference to the Shared Library
public interface IModelRule {
ValidationResult Validate(String fieldName, object fieldValue);
}
Next, I create a new class in the SharedLibrary called Validation- Result, which consists of two fields. The IsValid field tells you whether the rule is valid or not, while the Message field contains the error message to be displayed when the rule is invalid. Here’s that code:
public class ValidationResult {
public bool IsValid { get; set; } public String Message { get; set; }
The sample application uses four different rules, all of which are public classes that inherit from the Attribute class and implement the IModelRule interface.
Now it’s time to create the rules. Keep in mind that all valida- tion rules are simply classes that inherit from the Attribute class and implement the IModelRule interface’s Validate method. The max-length rule in Figure 4 returns an error if the text entered is
Figure 6 Adding a Registration Form Link
longer than the specified maxi- mum length. The other rules, for Required, Phone and Email, work similarly, but with different logic for the type of data they validate.
Creating the Blazor
Registration Form
Now that the validation engine is complete in the shared library, it can be applied to a new registra- tion form in the Blazor application. I start by first adding a reference to the shared-library project from the Blazor application. You do this from the Solution window of the Reference Manager dialog box, as shown in Figure 5.
Next, I add a new navigation link to the application’s NavMenu. I open the Shared\NavMenu.cshtml file and add a new Registra- tion Form link to the list, as shown in Figure 6.
Finally, I add the new RegistrationForm.cshtml file in the Pages folder. You do this with the code shown in Figure 7.
The cshtml code in Figure 7 includes four <TextInput> fields inside the <form> tag. The <TextInput> tag is a custom Blazor component that handles the data binding and error-display logic for the field. The component only needs three parameters to work:
• Model field: Identifies the class it’s data-bound to.
• FieldName: Identifies the data member to data bind to. • DisplayName field: Enables the component to display
user-friendly messages.
Inside the @functions block of the page, the code is minimal.
The OnInit method initializes the model class with some test data inside it. It binds to the ModelChanged event and calls the Check- Rules method to validate the rules. The ModelChanged handler calls the base.StateHasChanged method to force a UI refresh. The Register method is called when the Register button is clicked, and it sends the registration data to a back-end WebAPI service.
The TextInput component contains the input label, the input text- box, the validation error message and the logic to update the model as the user types. Blazor components are very simple to write and provide a powerful way to decompose an interface into reusable parts. The parameter members are decorated with the Parameter attribute, letting Blazor know that they’re component parameters.
The input textbox’s oninput event is wired to the OnFieldChanged handler. It fires every time the input changes. The OnFieldChanged handler then calls the SetValue method, which causes the rules for that field to be executed, and the error message to be updated in real time as the user types. Figure 8 shows the code.
Validation on the Server
The validation engine is now wired up and working on the client. The next step is to use the shared library and the validation engine on the server. To do this, I start by adding another ASP.NET Core Web Application project to the solution. This time I choose API
}
<div class=@(collapseNavMenu ? "collapse" : null) onclick=@ToggleNavMenu> <ul class="nav flex-column">
<li class="nav-item px-3">
<NavLink class="nav-link" href="" Match=NavLinkMatch.All>
<span class="oi oi-home" aria-hidden="true"></span> Home </NavLink>
</li>
<li class="nav-item px-3">
<NavLink class="nav-link" href="counter">
<span class="oi oi-plus" aria-hidden="true"></span> Counter
</NavLink> </li>
<li class="nav-item px-3">
<NavLink class="nav-link" href="fetchdata">
<span class="oi oi-list-rich" aria-hidden="true"></span> Fetch data </NavLink>
</li>
<li class="nav-item px-3">
<NavLink class="nav-link" href="registrationform">
<span class="oi oi-list-rich" aria-hidden="true"></span> Registration Form
</NavLink> </li>
</ul> </div>
18 msdn magazine
C#
