
Page 53 - MSDN Magazine, July 2018
P. 53
255. File mnist_test_100_cntk.txt has 100 images and uses the same CNTK-friendly format.
In most neural network prob- lems, you want to normalize the predictor values. Instead of directly normalizing the pixel values in the data files, the demo program normalizes the data on the fly, as you’ll see shortly.
The Demo Program
The complete demo program, with a few minor edits to save space, is presented in Figure 3. All normal error checking has been removed. I indent with two space characters instead of the usual four to save space. Note that the “\” character is used by Python for line continuation.
The mnist_dnn.py demo has
one helper function, create_reader.
All control logic is in the single main function. Because CNTK is young and under continuous development, it’s a good idea to add a comment detailing which version is being used (2.4 in this case).
Installing CNTK can be a bit tricky if you’re new to the Python world. First you install an Anaconda distribution of Python, which contains the required Python interpreter, the necessary packages such as NumPy and SciPy, and useful utilities such as pip. I used Anaconda3 4.1.1 64-bit, which includes Python 3.5. After installing Anaconda, you install CNTK as a Python package, not a stand- alone system, using the pip utility. From an ordinary shell, the command I used was:
>pip install https://cntk.ai/PythonWheel/CPU-Only/cntk-2.4-cp35-cp35m-win_amd64.whl
Note the “cp35” in the wheel file that indicates the file is for use with Python 3.5. Be careful; almost all the CNTK installation failures I’ve seen have been due to Anaconda-CNTK version incompatibilities.
It’s usually a good idea to explicitly set the CNTK global random number seed so your results will be reproducible.
The signature of the reader function is create_reader(path, input_dim, output_dim, rnd_order, m_swps). The path param- eter points to a training or test file that’s in CNTK format. The rnd_order parameter is a Boolean flag that will be set to True for training data because you want to process training data in random order to prevent oscillating without making training progress. The parameter will be set to False when reading test data to evaluate model accuracy because order isn’t important then. The m_swps parameter (“maximum sweeps”) will be set to the constant msdnmagazine.com
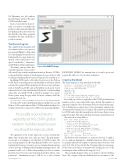
Figure 2 An MNIST Image
INFINITELY_REPEAT for training data (so it can be processed repeatedly) and set to 1 for test data evaluation.
Creating the Model
The demo prepares a deep neural network with:
train_file = ".\\Data\\mnist_train_1000_cntk.txt" test_file = ".\\Data\\mnist_test_100_cntk.txt" C.cntk_py.set_fixed_random_seed(1)
input_dim = 784
hidden_dim = 400
output_dim = 10
X = C.ops.input_variable(input_dim, dtype=np.float32) Y = C.ops.input_variable(output_dim) # 32 is default
It’s usually a good idea to explicitly set the CNTK global random number seed so your results will be reproducible. The number of input and output nodes is determined by your data, but the num- ber of hidden processing nodes is a free parameter and must be determined by trial and error. Using 32-bit variables is the default for CNTK and is typical for neural networks because the precision gained by using 64 bits isn’t worth the performance penalty incurred.
The network is created like so:
with C.layers.default_options(init= C.initializer.uniform(scale=0.01)): h_layer1 = C.layers.Dense(hidden_dim,
activation=C.ops.relu, name='hidLayer1')(X/255) h_layer2 = C.layers.Dense(hidden_dim, activation=C.ops.relu, name='hidLayer2')(h_layer1) o_layer = C.layers.Dense(output_dim, activation=None,
name='outLayer')(h_layer2)
dnn = o_layer # train this
model = C.ops.softmax(dnn) # use for prediction
The Python with statement is a syntactic shortcut to apply a set of common arguments to multiple functions. Here it’s used to initialize all network weights to random values between -0.01 and +0.01. The X object holds the 784 input values for an image. Notice that each value is normalized by dividing by 255 so the actual input values will be in the range [0.0, 1.0].
The normalized input values act as input to the first hidden layer. The outputs of the first hidden layer act as inputs to the
July 2018 47
