
Page 26 - MSDN Magazine, July 2018
P. 26
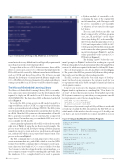
Figure 5 Simulation of Using an ELL Model on an IoT Device
neural network is very difficult and would typically require much more than four weeks of development effort.
I suspect that as the use of IoT devices increases, there will be efforts to create open source C/C++ libraries that implement the IO for ML models created by different neural network libraries such as CNTK and Keras/TensorFlow. Or, if there’s enough demand, the developers of neural network libraries might create C/C++ IO APIs for IoT devices themselves. If you had such a library, writing custom IO for an IoT device would be relatively simple.
The Microsoft Embedded Learning Library
The Microsoft Embedded Learning Library (ELL) is an ambi- tious open source project intended to ease the development effort required to deploy an ML model to an IoT device on the edge (microsoft.github.io/ELL). The basic idea of ELL is illustrated on the left side of Figure 4.
In words, the ELL system accepts an ML model created by a supported library, such as CNTK, or a supported model format, such as open neural network exchange (ONNX). The ELL system uses the input ML model and generates an intermediate model as an .ell file. Then the ELL system uses the intermediate .ell model file to generate executable code of some kind for a supported target device. Put another way, you can think of ELL as a sort of cross-compiler for ML models.
A more granular explanation of how ELL works is shown on the right side of Figure 4, using the iris flower model example. The process starts with an ML developer writing a Python program named iris_nn.py to create and save a prediction model named iris_cntk.model, which is in a proprietary binary format. This process is shown in Figure 1.
The ELL command-line tool cntk_import.py is then used to create an intermediate iris_cntk.ell file, which is stored in JSON format. Next, the ELL command-line tool wrap.py is used to gen- erate a directory host\build of C/C++ source code files. Note that “host” means to take the settings from the current machine, so a more common scenario would be something like \pi3\build. Then the cmake.exe C/C++ compiler-build tool is used to generate
a Python module of executable code, containing the logic of the original ML model, named iris_cntk. The target could be a C/C++ executable or a C# executable or whatever is best-suited for the target IoT device.
The iris_cntk Python module can then be imported by a Python program (use_iris_ell_model.py) on the target device (my desktop PC), as shown in Fig- ure 5. Notice that the input values (6.1, 3.1, 5.1, 1.1) and output values (0.0321, 0.6457, 0.3221) generated by the ELL system model are the same as the values generated during model development (Figure 1) and the values generated by the custom C/C++ IO function (Figure 3).
The leading “(py36)” before the com- mand prompts in Figure 5 indicate I’m working in a special Python setting called a Conda environment where I’m using Python version 3.6, which was required at the time I coded my ELL demo. The code for program use_iris_ell_model.py is shown in Figure 6. The point is that ELL has generated a Python module/package
that can be used just like any other package/module.
The ELL system is still in the very early stages of develop- ment, but based on my experience, the system is ready for you to experiment with and is stable enough for limited production
development scenarios.
I expect your reaction to the diagram of the ELL process in
Figure 4 and its explanation is something like, “Wow, that’s a lot of steps!” At least, that was my reaction. Eventually, I expect the ELL system to mature to a point where you can generate a model for deployment to an IoT device along the lines of:
source_model = ".\\iris_cntk.model" target_model = ".\\iris_cortex_m4.model" ell_generate(source_model, target_model)
But for now, if you want to explore ELL you’ll have to work with several steps. Luckily, the ELL tutorial from the ELL Web site on which much of this article is based is very good. I should point out that to get started with ELL you must install ELL on your
Figure 6 Using an ELL Model in a Python Program
# use_iris_ell_model.py # Python 3.6
import numpy as np
import tutorial_helpers # used to find package import iris_cntk as m # the ELL module/package
print("\nBegin use ELL model demo \n")
unknown = np.array([[6.1, 3.1, 5.1, 1.1]], dtype=np.float32)
np.set_printoptions(precision=4, suppress=True) print("Input to ELL model: ")
print(unknown)
predicted = m.predict(unknown) print("\nPrediction probabilities: ") print(predicted)
print("\nEnd ELL demo \n"
20 msdn magazine
Machine Learning
