
Page 25 - MSDN Magazine, May 2018
P. 25
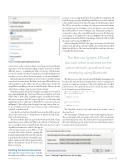
Figure 1 Enabling Shared Experiences
can be done in the system settings, in Settings |System | Shared experiences. For the team messaging scenario, you need to enable different users to communicate with your device, which means you need to make sure shared experiences is enabled and that you can share or receive from “Everyone nearby,” as shown in Figure 1.
The final requirement is that your device be discoverable by having some level of connectivity. The Remote System APIs will discover other machines on the same network, as well as those nearby by using Bluetooth. Bluetooth can be enabled in the “Bluetooth and other device settings” page in your system settings.
With the machine set up, let’s begin by creating a new Visual C# app using the Blank App (Universal Windows) template in Visual Studio 2017. Call the app “TeamMessenger.” As mentioned earlier, this project requires the Fall Creators Update, so set the target and minimum versions of the app to “Build 16299” or greater, as shown in Figure 2. This will prevent the app from supporting older ver- sions of Windows 10, but it’s necessary for some of the features touched on in this article.
Note that if you don’t have the Fall Creators update SDKs on your device, the easiest way to obtain them is to update Visual Studio 2017 to the latest release.
The Project Rome APIs are part of the Windows 10 SDK, which means there are no additional SDKs to download or NuGet pack- ages to install in order to build this app. There are, however, a few capabilities that must be added to the app in
a remote session using the Remote System APIs. For simplicity, I’ll build this page using the MainPage.xaml that was created with the solution and is already wired into the app to be the first page loaded. The UI has two modes: creating or hosting a session and joining an existing session. Creating a session requires a session name that will be public to users looking to join. Joining an existing ses- sion needs to show a list of available nearby sessions. Both modes need a name to be displayed to the user. Figure 3 shows what the resulting UI should look like for MainPage, and the XAML to build this page can be found in Figure 4.
After creating the XAML for the page, create a new ViewModels folder in the app, then add a new public class in that folder called MainViewModel.cs. This view model will be wired into the view to handle the functionality.
The Remote System APIs will discover other machines on the same network, as well as those nearby by using Bluetooth.
The first portion of the view model will handle managing state for the radio buttons that determine if the user is creating a new session or joining an existing one. The state is held in a bool called IsNewSession. Two methods are used to switch the status of this bool, CreateSession and JoinSession:
public bool IsNewSession { get; set; } = true; public void CreateSession()
{
IsNewSession = true;
order for the remote session APIs to work correctly. This can be done by opening the package.appxmanifest file and selecting the Capabilities tab. In the list of available capa- bilities, make sure the following are checked: Bluetooth, Internet (Client & Server) and Remote System.
Building the Session Connection
This app will consist of two pages, with the first page responsible for creating or joining msdnmagazine.com
Figure 2 Setting Target Versions for the App
}
public void JoinSession() {
IsNewSession = false;
}
The Checked event for each radio button is bound to one of these methods.
The remaining UI elements are tracked with simple properties. The session name and user name are bound to the SessionName and JoinName properties. The SelectedSession property binds to the SelectedItem property in the ListView and its ItemsSource is bound to the Sessions property:
May 2018 21
