
Page 45 - MSDN Magazine, April 2018
P. 45
need this message and want to forget it ever existed. One simple gesture (like a swipe left) and it’s off to the recycling bin. Execute mode doesn’t have to be destructive. Another great example is swipe to save. Say in one column you have a list of customers and when you select one a detail pane appears to the right. After the user makes changes to the form or customer record, he or she sim- ply swipes the item to save the changes. Simple and fast.
However, before I can create the swipe behavior on my list, I like to set up the SymbolIconSource for my application. This provides a really easy way to access icons for your application. Adding the symbols to page.resources allows me to easily add icons where needed later in the code. Regardless of implementing swipe, this is great at making code more readable and taking advantage of IntelliSense in Visual Studio. Here’s the code:
<Page.Resources>
<SymbolIconSource x:Key="ReplyIcon" Symbol="MailReplyAll" /> <SymbolIconSource x:Key="PinIcon" Symbol="Pin" /> <SymbolIconSource x:Key="DeleteIcon" Symbol="Delete" />
</Page.Resources>
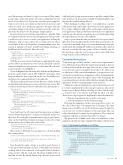
With the resources loaded, I can begin to implement the swipe gesture API on an element. List views are an extremely common element to implement swipe gestures, so that’s what I’ll work with, as shown in the code in Figure 1.
Notice in Figure 1 that I’m using the LeftItems and RightItems property in the SwipeControl API. LeftItems determines what happens when the user swipes left (in this case, RevealOptions) and places the command buttons to the right side.
The directional item references a Static Resource, which is defined in SwipeItems placed in page resources with my icons source. This is where I set the behavior mode to either Reveal or Execute, like so:
<Page.Resources>
<SwipeItems x:Key="RevealOptions" Mode="Reveal">
<SwipeItem Text="Reply" IconSource="{StaticResource ReplyIcon}" Foreground="White"/>
<SwipeItem Text="Pin" IconSource="{StaticResource PinIcon}" Foreground="White" />
</SwipeItems>
<SwipeItems x:Key="ExecuteOptions" Mode="Execute">
<SwipeItem Text="Delete" IconSource="{StaticResource DeleteIcon}" Invoked="SwipeItem_Invoked"
Background="Red" Foreground="White" />
</SwipeItems> </Page.Resources>
Now that I have the UI created and the interaction working, I can use the Invoke property to set up an event handler and process the action. Processing the command when a swipe is performed is done on the SwipeItems declaration in page.resources by setting the Invoked property. Here’s the code for that:
<SwipeItem Text="Delete" IconSource="{StaticResource DeleteIcon}" Invoked="DeleteItem_Invoked"
Background="Red" Foreground="White" />
Once in the codebehind, you can add your code for handling the command here:
private void DeleteItem_Invoked(SwipeItem sender, SwipeItemInvokedEventArgs args) {
int index = myListView.Items.IndexOf(args.SwipeControl.DataContext);
myListView.Items.RemoveAt(index); }
Even though the origin of swipe is rooted in touch devices, it works great with track pads and pen. I often find that when I’m working with a device that isn’t touch-enabled that I check for swipe gestures with the track pad. I’m always delighted when I find that it works. By default, Fluent Swipe Gesture actions work msdnmagazine.com
with track pads, giving users more ways to quickly complete their tasks and move on. It’s a perfect example of implementing for one input method and benefiting all users.
When thinking of adding swipe to your application, consider if the gesture will conflict with other behaviors in the application. Do you have a FlipView, Hub or Pivot as the main content area in your application? That’s probably not the best place to implement swipe because the interaction patterns are very similar and getting the right balance for users can be difficult.
Swipe is great when the same action needs to be repeated mul- tiple times, but remember that the result of the action needs to be consistent. I can’t think of a worse scenario than having a user who understands that swiping left will favorite an item, only to find on the next screen that the same gesture deletes it. Finally a tip: In my experience, swipe for touch or mouse users is best if the item being swiped is at least 300 pixels wide.
Connected Animations
Today, many apps and Web sites have “jerky” or non sequitur transi- tions. When an action is taken that requires page navigation, the user is only presented with the new page. There are few—if any—visual cues to provide context or guidance about what to do, where to go or what is new. With connected animations, you can preserve con- text for the user and increase engagement, such as by animating the clicked item from a list to the target location of the details page. Or you can keep the user’s Avatar visible while they navigate through an application. It’s all about maintaining context and focus.
Adding in connected animations is an incremental process. If you want to implement it for all your page transitions, please don’t let me stop you. But we all have a backlog of work to burn through, so it may be best to be selective and tackle the effort over time. There are two steps required to implement connected animations:
1. Prepare an animation object on the source page.
2. Start the animation on the destination page.
Preparing the animation on the source page allows you to set the source object that’s to be animated across the pages. The same image source should be set on the destination page, though you can use a lower-resolution image for the target page. This can reduce the memory footprint of your application. The connected
animation will then crossfade between the two images.
The general rule of thumb with connected animations is that animation should start approximately 250 milliseconds between
Figure 1 Implementing Swipe on a ListView
<ListView x:Name="MainList" Width="400" Height="500"> <ListView.ItemTemplate>
<DataTemplate x:DataType="x:String"> <SwipeControl x:Name="LVSwipeContainer"
LeftItems="{StaticResource RevealOptions}"
RightItems="{StaticResource ExecuteDelete}"> <StackPanel Orientation="Vertical" Margin="5">
<TextBlock Text="{x:Bind}" FontSize="18" /> <StackPanel Orientation="Horizontal">
<TextBlock Text="Data Template Font" FontSize="12" /> </StackPanel>
</StackPanel> </SwipeControl>
</DataTemplate> </ListView.ItemTemplate>
</ListView>
April 2018 39
